Friday

Chocolate Fantasy Fundraiser Tea: Chocolate Macadamia Nuts


Thank you all for the well wishes and good thoughts this week. I'm still not quite back to perfect health but my time is up as my husband is now sick.

I wanted to give one final Chocolate Fantasy recipe to close out this tea party theme. Coming up on Monday will be an Easter Brunch Tea Party so be sure to stop back then.

3 1/2 cups whole macadamia nuts
3/4 cup corn syrup
21 ounces bittersweet chocolate, melted
1 3/4 cups powdered sugar, optional
1 3/4 cups unsweetened Dutch-process cocoa powder, optional

Preheat the oven to 350 degrees F.

Place the nuts in a large mixing bowl. Add the corn syrup and stir until evenly coated. Place the nuts on a baking sheet and roast in the oven for 15 to 20 minutes. Remove from the oven. Using a wooden spoon, transfer the nuts onto a parchment paper-covered baking sheet pan. Do not touch them, as they are extremely hot. Let them cool at room temperature, or if possible, place them in the freezer.

When completely cooled, break apart any nut clusters that may have formed. Place the cooled nuts in a large mixing bowl. Slowly add one third of the bittersweet chocolate, one ladleful at a time. Fold the nuts until they are thoroughly coated and the chocolate has set. If you do not fold immediately, the chocolate will set and the nuts will stick together.

Add another third of the chocolate and fold thoroughly until set. Add the remaining third and fold thoroughly being sure all the nuts are well coated. Separate any clusters of nuts that may have formed.

If you serve the nuts as they are, let the chocolate set completely. If you decide to move on to the next step, do not wait for the chocolate to set completely. Add the powdered sugar or cocoa powder and stir until all of the nuts are well coated. If you'd like to coat half of the nuts in powdered sugar and the other half in cocoa powder, start with the powdered sugar. Before serving, place the nuts in a sieve to remove any excess sugar or cocoa powder. The nuts will keep at room temperature in an airtight container for up to 2 weeks.

Tuesday

Chocolate Fantasy Fundraiser Tea: Chocolate Pie

Growing up, chocolate pie was my brother’s favorite dessert so my mother made it often. I don’t think I’ve had a piece since I left home.

I’m a bit under the weather with the flu that’s been going around. So if I don’t stop by your blog in the next couple days I hope you’ll understand.

1 fully baked 9-inch pie crust
2/3 cup sugar
¼ cup cornstarch
3 tablespoons unsweetened, nonalkalized American-style cocoa powder
1/8 teaspoon salt
3 ½ cups whole milk, divided
2 tablespoons butter
4 ounces bittersweet or semisweet chocolate, coarsely chopped
2 ½ teaspoons vanilla extract

In a large heavy saucepan, stir together the sugar, cornstarch, cocoa powder and salt until well blended. Add about ¾ cup of the milk, stirring until smoothly incorporated. Gradually stir in the remaining milk and the butter. Bring to a boil over medium heat, stirring. Constantly stirring and scraping the pan bottom to prevent scorching, continue cooking until the mixture bubbles and thickens slightly, 2 to 2 ½ minutes. Immediately remove from the heat. Add the chocolate, stirring until it completely melts and the mixture is smooth. Stir in the vanilla.

Strain through a medium-fine sieve into pie shell. If you wish to prevent a skin from forming on the surface, lay plastic wrap directly on the filling. Cover and refrigerate for at least 24 hours before serving.

Monday

Chocolate Fantasy Fundraiser Tea: Devil's Food Cake

Did you know that American and Dutch-process cocoa are not the same and cannot be used interchangeably? American cocoa still contains its natural acidity and Dutch-process cocoa has been treated with an alkali to remove its acid. The alkalizing process turns the cocoa darker but gives it a milder flavor. Equally important, since the amount of baking soda in a recipe depends on the level of acidity, switching from one type of cocoa to another can upset the chemical balance.

Unfortunately, not all cocoa manufacturers clearly indicate whether their product is alkalized. Assume that American brands are not alkalized and that European brands are treated with alkali unless the labels say otherwise. So, in this recipe, you’ll be safe using Hershey’s Cocoa Powder.

4 ounces unsweetened chocolate, coarsely chopped
2/3 cup unsweetened, nonalkalized American-style cocoa powder
1 ¼ teaspoons baking soda
¾ cup boiling water
1 1/3 cups cake flour
1 cup all-purpose flour
¾ teaspoon baking powder
¼ teaspoon salt
1 ¼ cups butter, softened
2 2/3 cups sugar
5 large eggs
1 cup sour cream
2 ½ teaspoons vanilla extract
Chocolate Fudge Frosting, recipe below

Preheat oven to 350º. Insert rounds of parchment paper into the bottoms of three 9-inch round pans. Generously grease and flour the pans. Melt the chocolate over low heat or in the microwave.

In a medium bowl, stir together the cocoa powder and baking soda until well blended. Pour the boiling water over the mixture, stirring well; it will foam up. Let cool to warm. Sift together the flours, baking powder, and salt onto a sheet of baking parchment or wax paper.

In a large bowl with a mixer on medium speed, beat the butter for 1 ½ minutes. Add the sugar and beat for about 1 ½ minutes longer until well blended. Beat in the eggs, one at a time just until blended. Add the cocoa mixture and continue beating until the mixture is free of lumps. The mixture may look slightly curdled. Stir the chocolate; it should be warm and fluid. Beat the chocolate into the batter until smoothly incorporated. With the mixer on low, beat in half the dry ingredients, then the sour cream and vanilla. Beat for 1 minute. Beat or stir in the remaining dry ingredients just until smoothly incorporated.

Divide the batter evenly among the pans. Bake for 25-35 minutes or until a toothpick inserted in the center comes out clean but still moist and the layers are just beginning to draw away from the pan sides. Transfer the pans to wire racks. Let cool completely.

Carefully run a knife around the pan sides and rap them on the counter to loosen. Invert the layers onto racks. Ice using Chocolate Fudge Frosting.

Chocolate Fudge Frosting:

2/3 cup heavy cream
2/3 cup sugar
1 tablespoon butter, cut into chunks
1 ½ tablespoons light corn syrup
1 teaspoon vanilla extract combined with 1 ½ tablespoons water
8 ounces bittersweet or semisweet chocolate, coarsely chopped
2 ½ ounces unsweetened chocolate, coarsely chopped
11 ounces cream cheese, slightly softened and cut into chunks
2-2 ½ cups confectioners’ sugar
1-2 teaspoons water if needed

In a heavy saucepan, bring the cream, sugar, butter and corn syrup just to a full boil over medium-high heat, stirring often. Wash any sugar from the pan sides using a pastry brush dipped in warm water. Also wash any sugar from the stirring spoon. Boil briskly, stirring frequently for 3 minutes. Remove from the heat. Stir in the vanilla mixture and the chocolates until they completely melt.

Transfer the mixture to a large bowl. With mixer on low speed, beat in the cream cheese a few chunks at a time. Continue beating until well blended. Beat in 2 cups confectioners’ sugar. Raise the speed to medium-low and beat until the mixture is completely smooth, 1 to 2 minutes; it should be cool to the touch. If the frosting seems too thin to spread, beat in up to ½ cup more confectioners’ sugar. Let stand to firm up, 5 to 10 minutes. If the frosting is very stiff, add a teaspoon or two of water to thin it.

Friday

Chocolate Fantasy Fundraiser Tea: White Chocolate Cheesecake


I've read so many explanations for why cheesecakes sometimes crack. Some say it is because the oven is too hot or too dry; some say it is because the cheesecake cooled too quickly. Maybe it could also be because the ingredients were mixed too long or at too high speed. Whatever reason, cheesecakes do crack and it is a good idea to have a plan to cover the cracks. In this case, chocolate shavings cover the top and hide any problems.

Crust:
1 1/2 cup vanilla wafer cookies, in pieces
6 tbsp. butter, melted

Combine all in food processor, press into bottom of greased 9-inch springform pan. Bake at 350 degrees for 12 minutes.

Filling:
4 (8 oz. each) packages cream cheese, softened
1 1/4 cups sugar
3 tablespoons cornstarch
1/4 teaspoon salt
6 tablespoons flour
5 eggs
8 ounces sour cream
2 teaspoons vanilla
1 cup heavy cream
20 ounces good quality white chocolate (melted in double boiler)
extra white chocolate for grating on top

In a large mixing bowl, cream the cream cheese until fluffy. Add sugar, cornstarch, salt, flour and beat until smooth. Add eggs one at a time. Do not over mix. Add sour cream, cream and vanilla extract. Beat just until blended. Add melted chocolate.

Pour into prepared pan. Bake at 350º for 30 minutes then at 225º for 1 hour 45 minutes. Then turn off oven and let cheesecake remain 1 hour longer. Remove cheesecake from oven. Loosen springform band’s latch but allow to remain in place for 30 minutes. Remove band completely and cool. Refrigerate at least 6 hours, preferably overnight. Before serving, grate white chocolate over top.

Thursday

Chocolate Fantasy Fundraiser Tea: Raspberry Brownies

I’d like to tell you that this wasn’t my actual breakfast this morning…but it was. These Raspberry Brownies are the best brownies I’ve ever eaten. If you’re looking for a treat this weekend, tea or no tea, try these!

Brownies:
1 cup butter
1 ¼ cups sugar
½ cup brown sugar
4 large eggs
½ cup unsweetened cocoa powder
1 tablespoon framboise eau-de-vie (omit if you prefer)
1 teaspoon vanilla extract
¼ teaspoon salt
1 ¼ cups flour
1 ½-pint basket fresh raspberries

Glaze:
4 ounces semisweet chocolate, chopped
2 tablespoons framboise eau-de-vie (omit if you prefer)
2 teaspoons hot water

Powdered sugar

For brownies: Preheat oven to 325º. Grease 9x13-inch pan. Beat 1 cup butter, sugar and brown sugar in a large bowl until fluffy. Add eggs 1 at a time, beating well after each addition. Stir in cocoa, framboise, vanilla and salt. Gently mix in flour. Pour batter into prepared pan. Sprinkle raspberries evenly over batter. Bake until tested inserted into center of brownies comes out clean, about 30 minutes. Cool completely on a rack.

For glaze: Combine chocolate, framboise and water in top of a double boiler. Set over barely simmering water and stir until smooth. Cool slightly.

Drizzle glaze over brownies. Let stand until it sets, about 30 minutes. Sprinkle with powdered sugar just before serving. Makes 16 brownies.

Wednesday

My World Wednesday: Recipe Storage

The other day Rhoda from Southern Hospitality told us about the new binders she bought for organizing her collection of recipes. Rhoda is an amazing designer and beautiful woman and I’d expect her to have pretty things to hold her recipes. I thought I show you today the other end of the recipe storage spectrum with pictures of my own method.

I should be embarrassed to show this. But this is what has worked for me for the last 15 years. My recipe storage system is an old copy paper box.

Inside I have 30 plain, tan file folders for holding recipes I’ve clipped from magazines or written down from friends. My recipe categories are probably narrower than that of most people. For example, I have a file for desserts and additional ones for pies, cakes, 9”x13” desserts, cookies, bars, small desserts and extra fancy. Even though I use a lot of tea party recipes these days, I don’t separate them from my regular recipes because I’ve found they overlap too much.

One thing that has worked well for me is to clip only recipes that I really, really love. This way I don’t waste time looking at recipes that are too difficult, require ingredients that are hard to find or recipes that are just okay. Each recipe in the box is a winner.

Another reason I like my storage method is because I can cut out a recipe and throw it in the box loose. I don’t have to try to file it immediately but it won’t get lost once it hits the box. I usually sit down on my bed with the recipe box and file the accumulated recipes once every few months. It is a pleasure to do this, not a chore, as I get to review the recipes once again.

I’ve had prettier ways of storing my recipes but they never stuck. I’m not sure why. I guess the point is to find a method for organizing recipes that works even if it is one you don’t normally allow others to see.

While I’m talking about recipes, I thought I’d show you some of my cookbook collection. I think I counted 230 on this bookcase the other day. These are my “good” cookbooks that I use constantly. I have lots more cookbooks on my third-floor bookshelves but those are either very specialized, outdated or not my favorites. My oldest cookbooks still in active use are a Betty Crocker and Joy of Cooking both from around 1976.

My father-in-law made the bookcase for me when I was first married. I’d asked for something simple but big and he came through. At one point, we moved into a house with a very narrow, curvy staircase. In order to get the bookcase up to the second floor office, we had to cut a couple feet from it. Then my husband hoisted it up through a window. I have a pretty Victorian bookcase downstairs but this simple one has been in my office for over 30 years.

Moonshadow from KS Born tagged me for this interesting book meme. Step one is to take the first book you lay eyes on that fits the rules. Not your favorite book, but the closest at hand:The rules are as follows...1. The book must be over 123 pages.
2. Find page 123 in the book.
3. Find the first 5 sentences.
4. Post the next 3 sentences.
5. Tag other people

My book was Baking by Dorie Greenspan and this is what I found at the designated spot:
“Cookies like these are not difficult to make, but several take a bit more TLC than bar or cookie jar cookies. Save them for an afternoon when you are looking forward to fussing a bit, when you’ve got the time to mold, roll or even fry dough—as you will with Mrs. Vogel’s Scherben. You can also save them for a time when you want to show off.”

Tuesday

Chocolate Fantasy Fundraising Tea Party: Hot Chocolate


While tea will probably be the main drink of choice for adults at this fundraiser, kids will appreciate hot chocolate. This recipe makes 20 cups but can be doubled. It can be held and kept hot in a crock pot. Offer small marshmallows and chocolate sprinkles if you like.

1 1/2 cup sugar
1 1/4 cup cocoa powder
1 1/4 teaspoon salt
3/4 cup hot water
1 gallon milk
1 teaspoon vanilla extract
1/4 teaspoon cinnamon

In large saucepan, combine sugar, cocoa and salt. Add hot water slowly, mixing well. Cook over medium heat, stirring constantly, until mixture boils. Boil and stir 2 minutes. Add milk; heat to serving temperature, stirring occasionally. DO NOT boil after adding milk. Remove from heat; add vanilla, cinnamon, and whip with a whisk

Monday

Chocolate Fantasy Fundraising Tea Party

Late winter is the perfect time for a tea party; this is true for individuals as well as for organizations. Obligations usually lighten after the holidays, so it isn’t difficult to find lots of willing hands to help host this tea. While the Chocolate Fantasy Tea Party would work in the home, it is really meant to be enjoyed by a large group.

This tea would work perfectly for groups within an organization. For example, maybe the third grade PTA moms would host for the rest of the PTA moms or the young married class at church would host for the other church members. An organization could open this tea party to the general community too if they have a large team of volunteers.

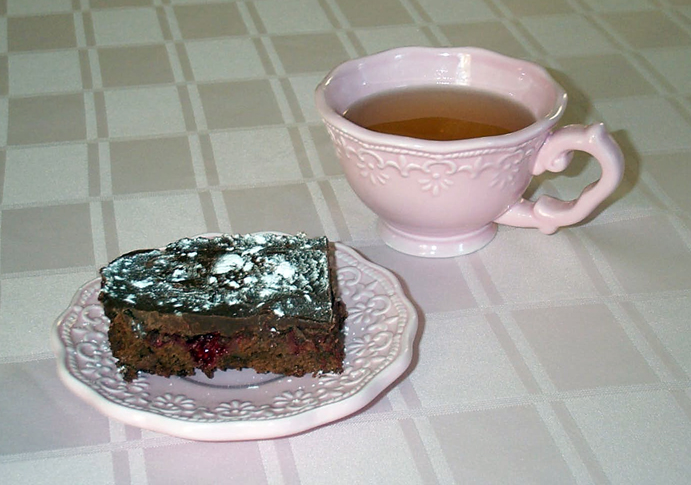
The Chocolate Fantasy Tea Party features only chocolate desserts, tea and other beverages. Imagine a fancy bake sale crossed with a buffet line. This is a tea that men and women and children can enjoy. It should look pretty, of course, but elegant wouldn’t really work here.

Long tables arranged in a U-shape hold the various chocolate treats that are offered. Guests first pick up a simple white dinner plate and walk along in buffet fashion. They may take as many of the desserts as they like. Each dessert is priced separately so that someone taking a few chocolate truffles doesn’t pay as much as someone with chocolate cheesecake, fudge and a brownie on her plate.

How to pay depends on the size of the event. For a small tea, each guest through the buffet can receive a ticket marked with the cost of the items on her plate. Colored stickers work well here, a red circle indicates a $1.00 item, a green sticker for a $2.00 item, etc. A cashier at the end of the line can total the bill and collect the money. For a larger tea though, all desserts can be categorized by type, priced accordingly, the cashier looks at the guest’s plate and totals her bill. This method is quicker but there is an extra step initially.

The tea guests are then directed to the dining area where they will find tables designed by each table hostess. So long as the hostess follows a chocolate theme, she should decorate as she pleases but this isn’t the time for using the good china, especially if children are welcome. Creativity is the important feature here and admiring the various table designs is part of the fun. Each guest will find a napkin, silverware and a water glass at her seat. The table hostess will take orders for the various teas offered or other drinks that may be available.

For many fundraiser or group teas, everyone is asked to bake or prepare the same foods from the same recipes. For the Chocolate Fantasy Tea Party though, each volunteer should make whatever she most loves. Variety is important to this event. There should be a control sheet though so that there aren’t ten chocolate cakes and only one pie.

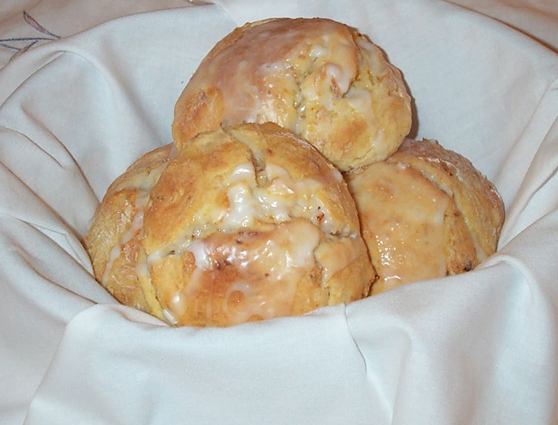
Categories to fill include: cakes, cheesecakes, cookies, brownies, candies, pastries, breads and muffins. Be sure to have a nice mix of large desserts like cakes and small ones like cookies. Figure, just about everyone can make a chocolate chip cookie but not all of us make big, gorgeous chocolate cakes.

Try to estimate how many guests you’ll have. In a closed group, this shouldn’t be too difficult but when the tea is open to the public, it is pretty hard. You could sell advance tickets but that limits folks who hear about this tea at the last minute. Do your best to have enough chocolate treats for everyone who shows up but when the desserts run out, they run out.

Don’t fill the buffet tables with too many of the same item at the same time. Depending on space, you might decide to cut only one cake at a time or display only one basket of chocolate muffins instead of putting out all 5 baskets you’ve received. Or you might combine pieces or slices from different bakers on the same serving platter. It would look good to have a big plate of several kinds of brownies for your tea guests to choose from.

It is always nice to have a few door prizes or raffle items. A specially decorated cake from your town’s best bakery would be a sweet win. The bakery will probably give a discount in exchange for the advertising. The cake could be present or a photo and a gift certificate could be used as your guests might be rather full and not want more cake for a while. At the other end of the spectrum, a gift certificate for a spa day or exercise class could be fun too.

One word about chocolate fountains—don’t. They are expensive to rent, $500 plus the cost of the chocolate. The chocolate must be melted before it goes into the fountain which means time, mess and extra dirty things to wash. And people think it is funny to stick their fingers and tongues directly into the chocolate flow.

This Chocolate Fantasy Tea Party is a good money maker. All food is donated, each table hostess is responsible for her table decorations and there won’t be any shortage of guests. Please see my post Fundraising Tea Party for more details on holding this kind of tea party.

Chocolate recipes begin tomorrow!

Moonshadow from KS Born gave me this "Keep up the Good Work" award. I pass it on to all of the bloggers on my sidebar. I read each of those blogs several times a week and they never fail to amuse, to touch and to inspire.

Friday

Winter White and Spring Green Tea Party Timetable


This post concludes my ideas and recipes for the Winter White and Spring Green Tea Party. A new theme begins Monday!

I'm participating in Payin' it Forward from Moonshadow's blog at KS Born. Everyone who has a blog is welcome to take part. The first three people to leave a comment saying they'd like to participate will receive a gift from me in the next 365 days. The only condition is that those people will have to do the same on their blogs. Pay it Forward! Don't forget to specifically mention in your comment that you want to do this too.

A Week Before:
Make the Truffles
Bake the Frosty Apricot Scones and freeze

Two Days Before:
Prepare the Herbed Potato Soup

The Day Before:
Bake, fill and ice the Lime-Filled Cupcakes
Extract the seeds from the pomegranate for Brie Sandwiches
Steam the shrimp for the Shrimp Bites

Morning of the Tea Party:
Prepare the White Chocolate Strawberries and allow to harden
Mix the filling for the Avocado-Almond Tea Sandwiches
Mix the base for the Shrimp Bites
Prepare the cream topping for the Chambord Grapes

Just before the Party:
Fill the Avocado-Almond Tea Sandwiches
Prepare the Brie Tea Sandwiches
Assemble the Shrimp Bites
Bake the frozen scones to reheat
Assemble the Chambord Grapes
Make the tea


Thursday

Happy Valentine's Day!

I wanted to share with you a few more of Aunt Beulah's postcards. These are from about 1907-8. She had only a few cards for Valentine's Day. I don't know if this wasn't a popular holiday back then or whether she used those cards, perhaps for a schoolroom display, instead of saving them. I found it interesting that the cards are rather muted in color and they aren't decorated with hearts in the typical way we think of Valentine's Day now. I hope you enjoy looking at them though and that you each have a sweet day.


Wednesday

My World Wednesday: I Won!

"Cream from the Monarch’s Milkweed
Lightened steamy Rosebud and Dandelion teas.”

Doesn’t that sound like the perfect tea for a little girl? That’s a line from a poem called “Tea in an English Wooded Garden.” The writer is Deborah D. Cashwell from Pictures, Pots and Pens.

Recently Deborah held a drawing for a book of poetry and I won. What a lovely book it is too. Its title is “The Baker’s Dozen, The Cole Foundation Collection: Volume II.” It is filled with wonderful poetry from thirteen different poets.

The moods and styles of poetry are as varied as can be. Love, unrequited love, life, mental illness, beauty of nature, from the deepest of thoughts to the lightness of a dragonfly—it all is part of this world of poetry.

Deborah says she writes gentle poetry. Her words evoke memories from all five senses. I can’t pick a favorite of her poems yet as it takes many readings and an almost memorization for me to have favorites. But these are certainly poems I will read over and over.

I want to thank Deborah for offering this book of poetry and for picking my name to win. She wrote a lovely inscription that I especially treasure too. I don’t want to forget that she included a Vera Bradley candle for helping to set the mood for reading poetry. It smells soooo good.

Any poetry lover whether new to poetry or someone who has loved poetry forever would enjoy this book. Please visit Deborah’s blog for specifics on getting your own copy.

Thank you again, Deborah!

Tuesday

Winter White and Spring Green Tea Party: White Chocolate Strawberries


This simple recipe makes a pretty Valentine treat too!

1 bag (12 ounces) white baking chips
1 tablespoon shortening
18 large strawberries with leaves

Cover a cookie sheet with waxed paper. Heat white baking chips and 1 tablespoon shortening in a saucepan over low heat, stirring constantly until melted.

For each berry, hold by the stem and dip into the melted chocolate, leaving the top and leaves uncovered. Place on the waxed paper. Refrigerate about 30 minutes to set the chocolate.

Monday

Winter White and Spring Green Tea Party: Lime-Filled Cupcakes

Cupcakes:
1 ½ cups cake flour
1 teaspoon baking powder
1/8 teaspoon salt
6 tablespoons whole milk
1 teaspoon vanilla extract
¼ teaspoon almond extract
6 tablespoons butter, room temperature
1 cup sugar
6 large egg whites
¼ teaspoon cream of tartar

Preheat the oven to 350º. Line 12 muffin tins with papers.

Sift flour, baking powder, and salt into a bowl and set aside. In a measuring cup, stir the milk and vanilla and almond extracts together.

Using a mixer, beat the butter and sugar until blended and light, about 2 minutes. Add the flour mixture in 3 additions and the milk mixture in 2 additions, beginning and ending with the flour mixture. Set aside

In another bowl with clean beaters, beat the egg whites and cream of tartar on low until the whites are foamy and the cream of tartar dissolves, about 1 minute. Beat on medium-high until soft peaks form. Use a spatula to fold one-third of the whipped egg whites into the batter, and then fold in the remaining whites until no streaks of egg white remain.

Fill each paper with 1/3 cup of batter, to about ¼ inch below the top. Bake about 23-25 minutes. The tops should remain pale or barely brown just on the edges. Cool cupcakes, and then fill.

Lime Filling:
¼ cup butter
1/3 cup fresh lime juice
2 large eggs
2 large egg yolks
1 cup sugar
2 tablespoons cornstarch, dissolved in ¼ cup water
1 teaspoon grated lime zest

In a saucepan, heat the butter and lime juice until the butter melts and the mixture is hot. In a bowl, whisk the eggs, egg yolks and sugar together to blend them, then whisk in the dissolved cornstarch. Whisking constantly, slowly pour the hot butter and lime juice into the yolk mixture. Return the mixture to the saucepan and cook over medium heat, stirring constantly just until it comes to a boil and thickens; it will take about 6 minutes. Immediately remove from the heat and stir in the lemon zest. Press plastic wrap directly onto the surface of the sauce and refrigerate until cold.

Fill the Cupcakes:
Cut a cone-shaped piece, about 1 inch across and 1 inch deep, out of the middle of the top of each cupcake and set aside. Spoon 1 tablespoon of lime filling into each hole. Replace the cone pieces of cupcake. Immediately frost the cupcakes.

Frosting:
½ cup butter, room temperature
3 cups confectioners’ sugar
1 teaspoon vanilla
3 to 4 tablespoons milk
½ cup sweetened coconut
lime wedges

Using a mixer on low, beat the butter, powdered sugar and vanilla together with 3 tablespoons milk, then add up to 1 tablespoon more milk if needed to form a creamy, smooth, spreadable frosting. Use a pastry bag and star tip to frost the top of each cupcake. Sprinkle the frosting very lightly with coconut. Top with a small wedge of lime.

Friday

Winter White and Spring Green Tea Party: White Chocolate Rum Coconut Truffles


This recipe makes about 48 truffles which is a lot. Serve them at your tea and send the leftovers home with your guests. Change out the rum with vanilla or almond flavoring, about 2 teaspoons, if you prefer. And if you don't like cashews, use a different nut or leave them out completely.

1 pound white chocolate, finely chopped
¾ cup heavy whipping cream
3 tablespoons light rum
1 ½ cup shredded sweetened coconut
½ cup cashews, very finely chopped

Place 1 pound of the chocolate into a bowl. In a saucepan over medium heat, bring the cream to a boil. Pour the cream into the bowl with the chocolate. Let the mixture stand for a minute, then stir together until thoroughly blended. Mix in the rum and 1 cup of the coconut and blend well. Cover the truffle cream and let cool to room temperature. Then chill in the fridge until thick but not stiff (2 to 3 hours).

Line 2 baking sheets with parchment or waxed paper. Using a small ice cream scoop, form the truffles into 1-inch diameter balls. Combine remaining coconut and cashews in a small, shallow bowl. Roll the balls into this mixture to cover. Allow the truffles to set up at room temperature. When set, place them in paper candy cups. Tightly wrapped they can stay in the fridge up to a month.

Thursday

Winter White and Spring Green Tea Party: Avocado-Almond Tea Sandwiches

It isn’t unusual, even for a seasoned cook, to have a kitchen disaster while preparing for a tea party. The hostess is often doing several things at the same time; it is easy to forget the tarts in the oven when chopping vegetables for the salad. Mechanical problems occur because appliances are doing extra duty. And a rotten headache or sick kid can really throw off the prep day.

I had my own kitchen problem this morning while trying to make these Avocado-Almond Tea Sandwiches. I’d carefully selected my avocados, firm to the touch with some give. I allowed them to sit for a couple days. But when I cut into the first one, it had nasty brown spots. Down the disposal it went. The next avocado was the same, spoiled.

Had I been preparing this recipe for an actual tea, I would have been peeved to have had to run back to the store. And even then I would have suspected the other avocados might be bad too. To tell the truth, I probably would have bought some prepared guacamole and finished these tea sandwiches with that as the base, adding the bacon and almonds.

Most tea party problems can ultimately be solved just that easily. Keeping the sense of panic out of any situation makes everything go so much smoother. We’ve all probably experienced having one thing go wrong and then another and then because we’re stressed and not thinking clearly, we can’t do anything right.

We want everything to be perfect for our tea party. We want to please and impress our guests. That’s okay. We should be making our best effort to do so. Like the t-shirt says though, stuff happens.

I have no photo of the finished tea sandwiches today. The recipe is not complicated and, I’m pretty sure, not difficult to imagine how it looks. The light green avocado on white bread gives the perfect Spring note to the Winter White and Spring Green Tea Party.

Almond-Avocado Tea Sandwiches:

Seed, peel and mash 1 large ripe avocado. Add 1 tablespoon lime juice, ¼ teaspoon chili powder, ¼ teaspoon seasoned salt and ¼ teaspoon pepper. Stir in ¼ cup toasted chopped almonds and 2 slices of crumbled crisp-cooked bacon. Cover the surface with plastic wrap and chill up to 4 hours.

Cut thin white bread on the diagonal for the tea sandwiches. Remove the crusts. Spread with the avocado filling. Use a small canapé cutter to create a cut-out in the top piece of bread so that the pretty green filling shows through.

Wednesday

Winter White and Spring Green Tea Party: Brie Sandwiches

Martha Stewart tells us that to remove pomegranate seeds, whack the pomegranate on the outside with a wooden spoon. Let me just say in doing that, I've only managed to cover the whole kitchen as well as myself with pomegranate juice. Use your fingers to coax the seeds from the membranes.

1/2 loaf of sourdough baguette, approx. 1" diameter, cut on a diagonal in 1/2 inch thick pieces
1 wedge brie, about the size of a generous doorstop, cut into 1/4-1/2 inch pieces, arrange on bread
1/2 cup pomegranate seeds. Remove them, rinse them, let dry. Sprinkle about 1 tsp to fit on top of brie for each piece of bread
1 leaf of fresh parsley per piece of bread
barest sprinkle of sea salt
Bake at 350 for about 15 min. DO NOT overcook.

Tuesday

Winter White and Spring Green Tea Party: Shrimp Bites

These Shrimp Bites have an aioli-like base. Real aioli calls for raw egg and a mortar and pestle. Then there is quick aioli which can be made in a food processor with pasteurized egg. And finally there is the dolled-up-mayonnaise method which I’ve used.

Another note on this little open-faced sandwich: as shrimp is the featured ingredient, use the nicest ones you can find and try to prepare them yourself. Those available at the deli are so often over steamed and over seasoned. That’s okay for shrimp salad or other dishes where shrimp is mixed with various ingredients but not good enough here. And use large count shrimp, about 26-34.

Caterers tell us that shrimp is the first thing to go when it is served. People often take seconds too. Consider preparing extra Shrimp Bites and passing them on a platter as your guest begin to eat the savory course.

shrimp, 1 pound
Old Bay Seasoning or other crab boil
good quality mayonnaise, 1 cup
lemon zest, 2 teaspoons
garlic, 1 clove minced finely
white bread, cut into rounds
green leaves for garnish

Steam or boil the shrimp with Old Bay. Remember, shrimp are done when they turn pink. Over-cooked shrimp and tough shrimp. If you aren’t sure they are finished, taste one. Peel the shrimp and leave whole. Refrigerate until serving.

Add the lemon zest and garlic to the mayonnaise. Allow the flavors to combine for a couple hours in the fridge.

Assemble by spreading the aioli mayonnaise on the bread rounds and topping with two shrimp. Add a sprinkle of Old Bay and top with a pretty green leaf. Celery leaves work nicely.

Monday

Winter White and Spring Green Tea Party: Frosty Apricot Scones

The scent of apricots baking in these scones perfumed my whole house yesterday. It smelled so good that my husband, dozing in his Lazy-Boy to watch the 13-hour pregame, actually got up and came to the kitchen. Scones—the new Super Bowl food!

3 cups flour
¼ cup sugar
1 cup dried apricots
1 tablespoon baking powder
½ teaspoon salt
5 tablespoons butter
2 eggs
¾ cup milk
2 teaspoons lemon zest
1 cup confectioners’ sugar
2 teaspoons milk

Preheat oven to 450º. Combine sugar and apricots in the bowl of a food processor and pulse until apricots are in small pieces. (Use a floured knife if you don't have a food processor.) Add the rest of the dry ingredients.

Cut the butter into small pieces and add it to the bowl. Process in pulses until the mixture has the appearance of fine cornmeal. Add lemon zest. (Use a pastry blender to cut in the butter if you don't have a food processor.)

Whisk the eggs and milk together. Add to the processor bowl and pulse just enough to combine.

Dump dough out on well-floured surface. Knead a few times, adding more flour as necessary. Pat or roll the dough to about 1” thickness. Cut into circles with pastry cutter. Place on parchment paper on cookie sheet or grease the sheet.

Bake for 10 to 15 minutes.

Remove from oven and cool on rack. Mix the confectioners’ sugar and milk to form a glaze, adding more milk if the mixture is too thick or more sugar if it is too thin. After the scones have cooled, drizzle with the glaze.

Saturday

Happy Groundhog Day!

February 2nd brings the most-watched weather forecast of the year--and the only one led by a rodent! Legend has it that on this morning, if a groundhog can see its shadow, there will be six more weeks of winter. If it cannot see its shadow, spring is on the way.

I don’t know about other places in the world but Groundhog Day is a big deal in my part of Pennsylvania. There is Phil in Punxsutawney, of course; he’s the most famous. But in my local area alone we have 5 groundhog lodges each checking on this day to see if their groundhog saw his shadow. We have Doug in Dover, Poor Richard in the city of York, Uni the groundhog in Myerstown, Octorara Orphie in Quarryville, Lancaster County and the newest from Berks County is Patty Pagoda. That’s a lot of groundhogs!

They’ve all seen their shadows this morning so I guess we’re in for six more weeks of winter. The truth of the matter is, whether the groundhogs see their shadows or not, spring will arrive as scheduled on March 21st.


Friday

Winter White and Spring Green Tea Party: Herbed Potato Soup

I love potato soup. It can be served hot in winter and cold in summer. Make it as chunky or as smooth as you like. Extra veggies can be added or it can be simple as is this recipe. Oh, bacon and cheese add flavor for sure but for a tea party, you don’t want guests filling up on the soup.

8 medium potatoes, peeled
2 onions, chopped
¼ cup butter
2 tablespoons chopped parsley
½ teaspoon crushed basil leaves
¼ cup flour
2 teaspoons salt
½ teaspoon pepper
2 cups cold milk
4 cups scalded milk
2 cups hot potato water

Cook potatoes and onions together until potatoes are tender. Drain but save the potato water. Put about half the potatoes through a ricer or coarse strainer and cut the rest in small chunks. Or if you like smooth soup, put all the potatoes through the strainer. You could use a food processor or blender but this gives the potatoes a slightly gluey consistency.

While the potatoes cook, melt the butter in a heavy saucepan. Add parsley and basil and blend in the flour, salt and pepper; gradually stir in the cold milk. Add scalded milk and the potato water after the potatoes have cooked.

Cook over medium heat; stir constantly until mixture thickens slightly. Stir in potatoes and onions and heat. This soup can be frozen. Makes 12 cups.